

Introduction
In today’s digital age, printers and scanners are still indispensable tools in both home and office settings. From school projects and business reports to family photos and legal documents, these devices play a vital role in our daily lives. However, many of us take these workhorses for granted until they start producing less-than-ideal results. The culprit? Neglecting the importance of regular cleaning and maintenance.
In this guide, we’ll explore the world of printer and scanner cleaning, helping you ensure that your equipment functions at its best. We’ll discuss the benefits of routine cleaning, walk you through a step-by-step cleaning process, and offer some invaluable tips to keep your devices in tip-top condition.
The Importance of Cleaning Your Printer and Scanner
Let’s start by understanding why cleaning your printer and scanner is so essential. Regular maintenance offers numerous advantages, including:
Enhanced Print and Scan Quality: Over time, dust, dirt, and dried ink can accumulate on your printer’s printhead or your scanner’s glass. This accumulation can result in streaks, smudges, and reduced image quality. Cleaning your equipment ensures crisp and clear prints and scans.
Extended Lifespan: A well-maintained printer or scanner is more likely to last longer. Investing time in cleaning can save you money in the long run by reducing the need for repairs or replacements.
Prevention of Paper Jams: Dust and debris can cause paper jams, a common frustration for anyone who uses a printer. Cleaning your equipment minimizes the risk of paper jams and the subsequent headaches they bring.
Cost Savings: Clean printers and scanners are more efficient, using less ink or toner to produce high-quality prints. By reducing ink or toner consumption, you’ll save money on replacement cartridges.
Professional Appearance: If you’re using your printer or scanner for business purposes, clean and well-maintained equipment helps create a positive impression on clients and colleagues.
How to Clean Your Printer and Scanner: Step by Step
Now that you understand the importance of cleaning your printer and scanner, let’s move on to the practical aspects of the cleaning process. Follow these step-by-step instructions to ensure that your devices stay in excellent condition:
Step 1: Gather Your Cleaning Supplies
Before you start, gather the necessary cleaning supplies. You’ll need:
Lint-free cloths or microfiber cloths: These are essential for wiping down surfaces without leaving lint or residue.
Isopropyl alcohol: It’s an excellent cleaning solution for removing ink, toner, and other residues.
Cotton swabs or Q-tips: These are helpful for getting into small, hard-to-reach areas.
Compressed air canister: To blow away dust and debris from your equipment.
User manual: Always consult your device’s manual for manufacturer-specific cleaning instructions.
Step 2: Power Off and Unplug Your Equipment
Safety is paramount when cleaning your printer and scanner. Start by turning off and unplugging both devices to prevent any accidents while cleaning.
Step 3: Clean the Exterior
Begin by wiping down the exterior surfaces of your printer and scanner using a lint-free cloth dampened with isopropyl alcohol. Pay special attention to buttons, control panels, and any areas that are frequently touched.
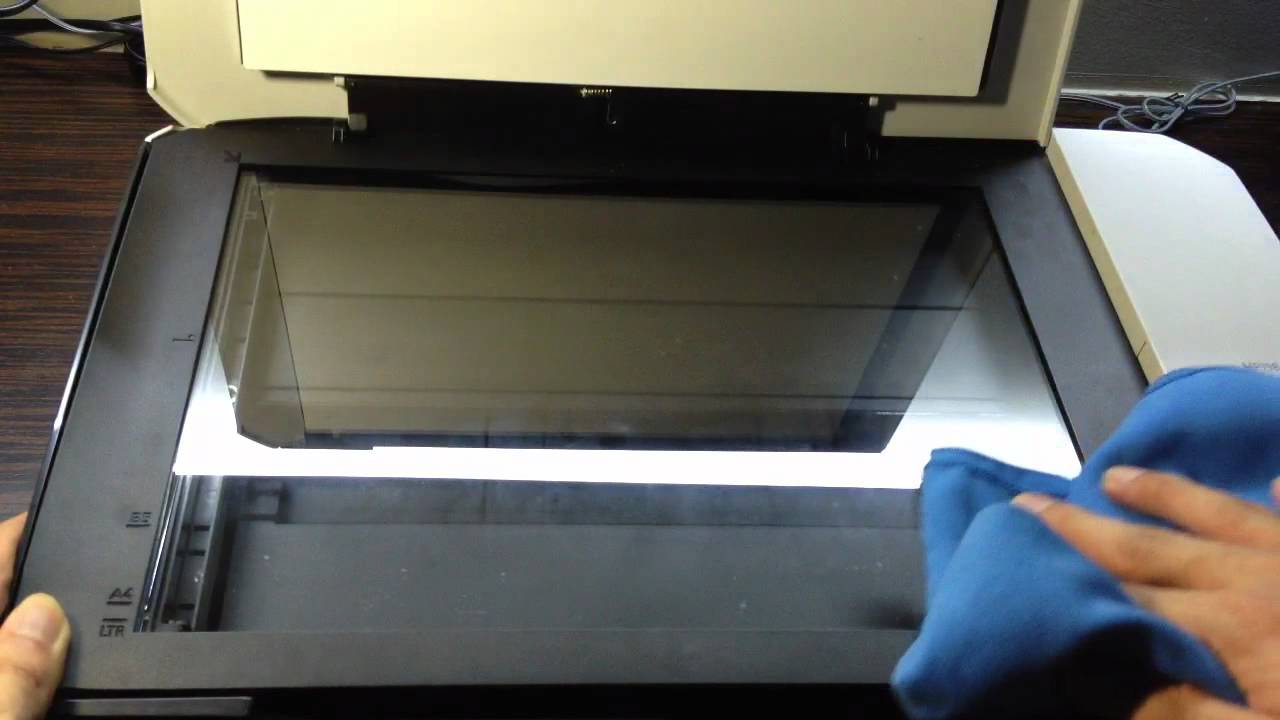
Step 4: Clean the Scanner Glass
For scanners, the glass is the most critical component to clean. Dust, smudges, and fingerprints can all affect scan quality. Follow these steps:
Spray a small amount of glass cleaner on a lint-free cloth.
Gently wipe the scanner glass in a straight, horizontal motion.
If stubborn smudges persist, use a cotton swab dipped in isopropyl alcohol to target specific areas.
After cleaning, double-check for any streaks or residue and re-clean if necessary.
Step 5: Clean the Printhead (For Inkjet Printers)
If you have an inkjet printer, cleaning the printhead is vital for optimal performance. Refer to your printer’s manual for instructions on how to access the printhead cleaning feature. This often involves running a printhead cleaning cycle from your computer.
Step 6: Clean the Toner Cartridge (For Laser Printers)
For laser printers, you’ll want to remove the toner cartridge and gently shake it to distribute the toner evenly. Be cautious not to spill toner, as it can be messy and challenging to clean.
Step 7: Clean the Paper Path and Rollers
Dust and debris can accumulate in the paper path and on the rollers, leading to paper jams. Consult your printer’s manual for instructions on how to access and clean these areas.
Step 8: Reassemble and Test Your Equipment
Once you’ve completed the cleaning process, reassemble your printer and scanner, plug them back in, and power them on. Print a test page and scan a document to ensure that they’re functioning correctly.
Important Tips for Ongoing Maintenance
In addition to the step-by-step cleaning process, consider these valuable tips for ongoing printer and scanner maintenance:
Regular Cleaning Schedule: Create a routine cleaning schedule to ensure that your equipment stays in top condition. Depending on your usage, this could be monthly, quarterly, or semi-annually.
Use Quality Paper: Choose high-quality paper to reduce the likelihood of paper jams and extend the life of your equipment.
Store Paper Properly: Keep your paper in a cool, dry place to prevent moisture-related issues that can affect print quality.
Update Firmware: Periodically check for and install firmware updates from your printer or scanner manufacturer. These updates can improve performance and fix bugs.
Replace Consumables: When ink or toner levels are low, replace the cartridges promptly to avoid damage to the printhead or imaging drum.
Handle with Care: Be gentle with your equipment. Avoid slamming paper trays and forcefully closing covers.
Conclusion
Maintaining your printers and scanners through regular cleaning and maintenance is a small investment that yields significant benefits. From improved print and scan quality to extended equipment lifespan and cost savings, the advantages are clear. By following the step-by-step cleaning process and implementing the tips for ongoing maintenance, you can ensure that your office equipment operates at its best for years to come.
Remember, a well-maintained printer and scanner are not only a sound investment but also a reliable partner in your daily tasks. So, show your equipment some love with a little TLC, and it will continue to serve you faithfully.